part number
details

2 styles - early P400/P400S solid bar , later P400S/SV C channel

 P400 trunk details
| Description |
Lamborghini part number |
OEM details |
Notes |
| light, trunk interior
- 1ea |
chrome rectangular
with opaque white glass lense |
see Fig. 2 and 3 |
|
| switch, trunk light |
CEAM clipon,
white button |
|
|
| knob, trunk trim panel
secure, lft/rt - 6ea |
black plastic,
threaded ball like knobs |
see Fig. 4 |
|
| lock, trunk release |
push button, Lancia
Fulvia |
see Fig. 1 |
|
| arm, trunk lid prop |
spring loaded swing
retract |
||
| pin, trunk hinge - 2ea |
6 x 60mm, steel,
4.4 dia grooves at 48mm apart 1.4 width |
pin pointed at one end
to ease install |
|
| E-ring circlip, trunk
hinge pin |
#4 |
din 6799 |
|
| hook , latch |
fastens to trunk lid
frame |
see Fig.6 |
|
| latch gate, spring
loaded |
fastens to body tail
section |
see Fig.5 |
|
| hinge, trunk lid - 2ea |
bolts to trunk frame,
over travel stops adjustable 2 styles - early P400/P400S solid bar , later P400S/SV C channel |
see Fig. 7 |
|
| bolts, trunk hinge to
lid - 4ea |
6x20 unmarked head,
zinc |
||
| washers, trunk hinge
to lid - 4ea |
6.1x18.3x2 zinc |
||
| internal tooth
lock - 4ea |
6mm black oxide |
||
| hose, drain left and
right |
rubber |
||
| plug, body left and
right |
rubber |
||
| weather strip, trunk
lid |
small round tube type,
glued in place |
||
| trim, aluminum angle,
black |
|||
| screws, aluminum angle
trim |
|||
| panel board, trunk
right |
Rexine vinyl covered
fiber hardboard (4.5mm) handhold slot. |
small pebble grain
flat black |
|
| panel board, trunk
left |
Rexine vinyl covered
fiber hardboard (4.5mm) no slot |
small pebble grain flat black | |
| panel, trunk trim
forward wall, 2 section |
Rexine vinyl covered
fiber pad, glued in place |
small pebble grain flat black | |
| panel, trunk trim
floor |
Rexine vinyl covered fiber pad, glued in place | small pebble grain flat black | |
| panel, trunk trim
rear, right |
Rexine vinyl covered
fiber pad, glued in place |
small pebble grain flat black | |
| panel, trunk trim
rear, left |
Rexine vinyl covered
fiber pad, glued in place |
small pebble grain flat black |
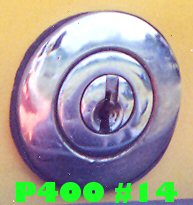
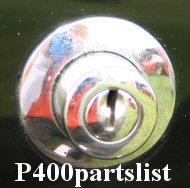
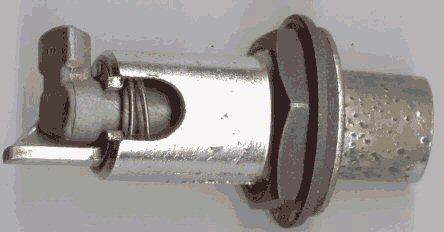 Fig.1 Fig.1I would like somone to identify this trunk button for me please. If it is Lancia, what year, model, etc |
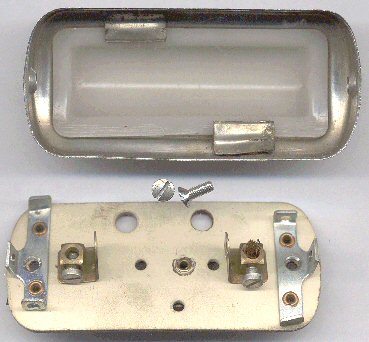 Fig 2 Fig 2inside a P400 trunk light. 2 oval chrome screws hold face on light at each end. The glass lens held in by soldered tabs. No marking found on anything! The light is riveted in the trunk thru the far end holes. The trunk light is difficult to see, but works well. Trunk photos will never show it as it is under the forward horizontal edge of the trunk. |
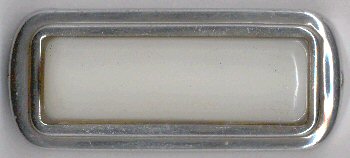 Fig.3 Fig.3P400 trunk light assembled. outside dimensions are - 85mm long x 40mm wide. installed the heigth or depth is 23mm. 11/2008 info from Jürgen Wilms - OKP Parts and Engineering Repro light |
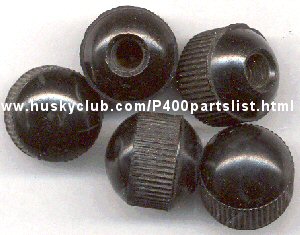 Fig.4 Fig.4P400 panel knobs, holding left and right trunk panels in place. threads are 6 x 1,0 , 19mm round dia, 19mm tall, hard black plastic. |
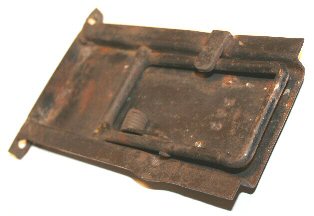 Fig. 5 Fig. 5trunk latch gate, which fastens to rear section , steel construction, numbered for build, spring loaded, custom weldment. 1.5mm sheet steel , 6mm rod for latch brazed to 8mm x 1mm wall tube for pivot on 6mm rod (welded to frame), 3mm material for stop. spring is 1.8 wire, 8mm id coil, 6 coils, preload 90deg. Tapped 1.5mm sheet for 4x.7 oval head screws |
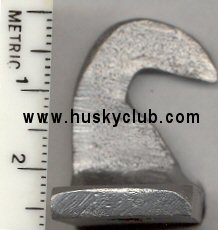 Fig. 6 Fig. 6 Trunk latch hook, fastens to trunk frame, P400 round tube frame only. 3mm steel material for hook, 4mm for base, butt weld, holes to fit existing tapped frame. build number . |
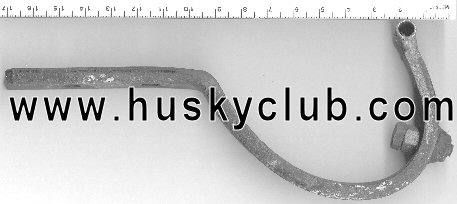 Fig. 7 Fig. 7Trunk hinge. 6mm x 20mm steel strap bent to shape, 6mm weldnut for overtravel bolt, 6mm ID tubing for pivot. The later model S/SV uses "C" channel material for this hinge (probably 2mm material, but 6mm channel). This later C style also has a "tongue" for tripping light switch on left hinge. |
Fig.8 Trunk lid prop rod early P400, riveted to body, also clip. Trunk lid prop arm late P400, spring loaded, welded to frame. |
| Fig. 9 round tube frame trunk lid - a very specific characteristic of a P400. The simple welded tube frame has a flange of flat steel sheet added, which allows the the aluminum skin to be crimped to it. |
Fig. 10 CEAM clip on style switch - P400 only There is a very specific location for this clip-on CEAM switch. It mates with a specific trunk frame pad that is added to the forward left edge of the round, tube steel frame of the trunk lid. The picture of #274 below shows the approximate correct location. |
11. Trunk weatherstrip -
rubber  splitline occurs at center rear, |
12. Trim angle strip - rear
edge of trunk - black - screwed to rear trunk frame -
see #4 in #274 photo below. |
13. Trunk liner panels Rexine vinyl used on all panels |
14. |
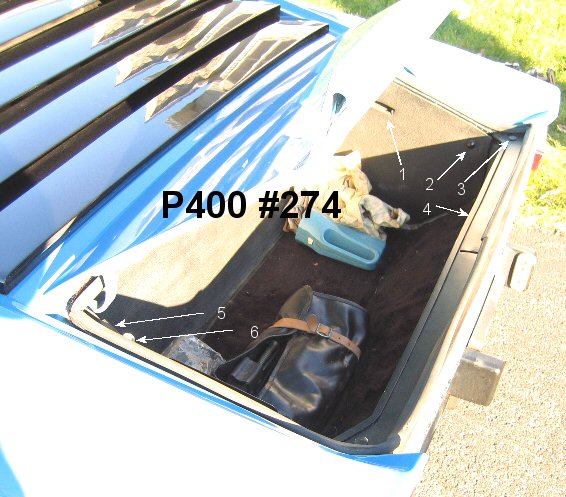 |
1. right side trunk panel w/slot 2. panel fastening knob 3. body plug 4. angle trim piece 5. rubber shielding for hot wire 6. trunk light switch - CEAM |
| Miura numbers |
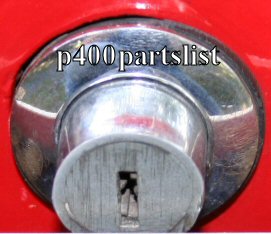
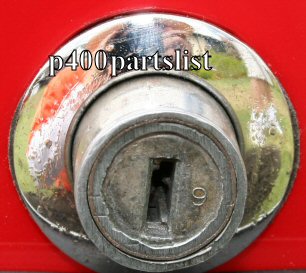
photo of trunk button |
photo of trunk button |
|
| unrestored early |
|||
| #14 |
 |
||
| unrestored examples after #98 |
restored examples after #98 |
||
| 3342 #137 |
 |
 |
|
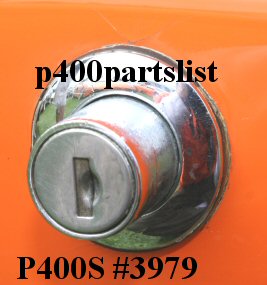
| 3979 #348 |
 |
 |
|
| 4986 #688 |
 |
||
| 5000 #696 |
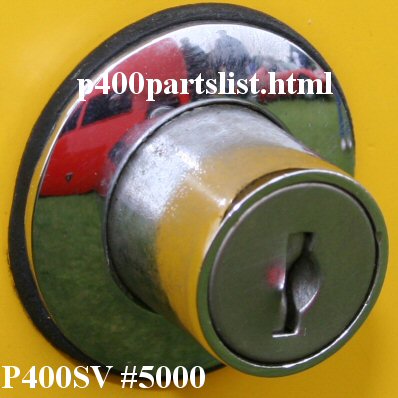 |
| P400S end |
 |
| P400S end |
 |
| Item |
photo |
index |
| complete assembly |
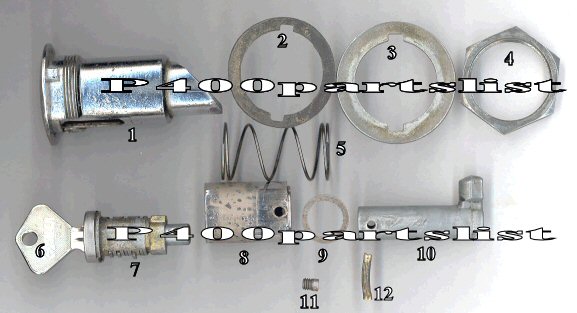 |
1-flange 2-body rubber gasket 3,4- inside washer.nut 5-main spring 7,8,9,10-button assembly 12 - pin holds 7,8,9,10 11-alignment screw pin |
| cylinder details |