Espada 400GT  Reference List
a technical comparision resource for all Lamborghini Miura  enthusiasts
Lamborghini Miura  P400 parts list, Lamborghini Miura P400S parts list, Lamborghini Miura P400SV,
Lamborghini Miura  P400, Lamborghini Miura P400S, Lamborghini Miura P400SV, Lamborghini Miura  P400, Lamborghini Miura P400S , Lamborghini miura parts list, Miura parts list,


March 1972 British Magazine color photo

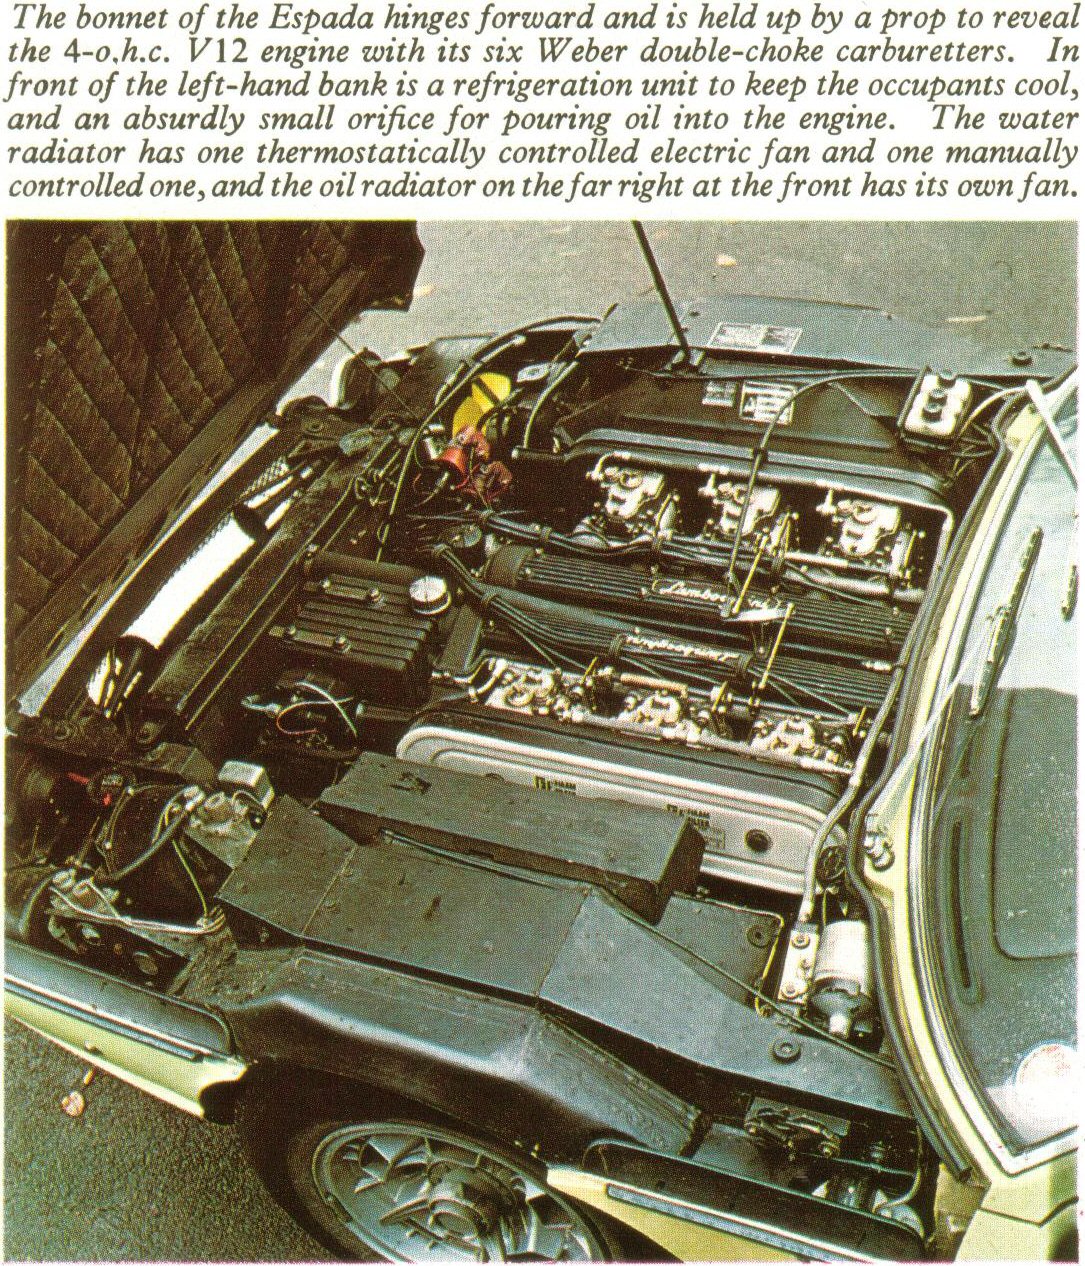
There are many important references here for a 1967-1973 Miura owner looking for documentation on details. This is an early S2 Espada, most likely 1971.

If you are looking for gleaming paint and bodywork, you will need to visit the more than 100 wonderful sites available. This is not the site for you. This is primarily a website for skinned knuckles and dirty fingernails.  If you have a Miura under restoration, please e-mail me, maybe I can help. I need help in providing more detail on this site as well.

TAV Parts list
TAV Owners manual S1
TAV Owners manual S2
TAV Owners manual S3
TAV Complete Shop manual


TAV-Espada wire Diagram

TAV-Espada Distributor Conversion to Pertronix

MagnetiMarelliWipers0001.pdf

www.miuraworkshop.com
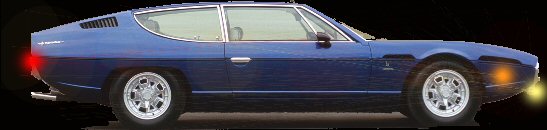
The first Espada  were built


Lamborghini Miura P400, Lamborghini Miura P400S, Lamborghini Miura P400SV, Lamborghini Miura P 400, Lamborghini P 400 S, Lamborghini Miura P 400 SV,  Carello, Bosch, Hella, Pirelli,


Troubleshooting at Vintage Lamborghini Garage  group -
I finished the fuel line replacement on Mike Trivich's 1969 Espada S-1.  All went well...No More Fuel Aroma!!! YEAH!!!   The fuel lines can now withstand alcohol in the fuel. (California)   I installed new clamps that do not bit into the hoses.I made a shield above the right rear muffler as it is a HOT spot. The orange liner on the gas line is a heat insulator.
All the rear (Black) lines are (SAE J1527 Type A1-15)  368 Series – ISO 7840. Shields low permeation fuel hose has a plastic barrier veneer with NBR outer layer tube to limit permeation. It is polyester reinforced and complies with EPA and CARB low permeation requirements. Shields low permeation fuel hose has a weather/UV resistant NBR/PVC cover. The temperature ranges from -20° F to 212° F. This hose is primarily used for fuel feed (gasoline up to 85% ethanol blended fuels/diesel/bio-diesel all blends).
The 12 foot line from the filter though the passenger compartment into the engine compartment is .040 Teflon (aircraft) with SS cover. This line will not give off gas smell at all.
The front lines were made up at Earl’s Performance Plumbing in Lawndale, CA.


Drove my restored Espada III(9310)into the garage Wed night and today  (Sun) it is dead as a doornail - nothing works.  No lights, fans, fuel  pump, starter, etc.
Battery charger shows battery fully charged and puting out 13.4 volts.  All fuses are OK.  Removed and cleaned battery cables.  Any suggestions??? It's probably something simple, but I am at a loss to figure it out. Thanks, Chuck

Hi Chuck, Live battery in one end and dead car in the other ? Check first all regular fuses are ok ( not only if burnt : but that they all have a positive contact at both ends). Put the headlight swtch in ON so the car will tell you when it is alive again. Start checking from the battery, with the aid of a multimeter also. Is the ground connection Ok ? ( all the way down to the chassis mount : remove, clean, reassemble) Follow the positive main supply cable from battery to the first fuse which is the ( often forgotten ) main fuse in the right hand side of the engine bay, smartly hidden near the wiper-motor ( LHD cars ) Check with the multimieter you have voltage reading : remove, clean, reassamble. From here two wires do continue : one to the starter solenenoide ( forget this one now ) the other to the AMP meter and from there it splits again into two wires : one for the ignition switch and the other to the ignition relays ( power on only when it receives ok from the ignition switch ) and also to the alternator. So you need to make sure you do get a voltage reading at entry and exit of the AMP-meter, then at the ignition switch and
at the exit of the ignition switch. If afirmative, proceed to the ignition relays to check that that "juice" arrives here too. If afirmative, then check proper operation of the relays here. If they work correct and your car is still dead, start to get worried, or call me and I will buy your car, cheap ! Good luck. Lars

Thanks, Lars.    That is just the info I wanted - some steps to follow to find the problem.  Unfortunatly, I didn't get very far as I can't find any "main fuse".  My car has two MSD 6A units installed; one bolted to the fire wall right under the wiper motor (which I have removed for access), the other bolted to the angled fender well right above the "ground connections".There are a number of of taped off connectors in this area and two large red connectors which I can't get apart - don't want to force them; but nothing that looks like a fuse connection.  Using a multimeter I have checked all the "pins" in the red connectors and all fuses and relays - NO VOLTAGE anywhere in the engine compartment.  There is power coming off the battery to the hot cable as the volt meter shows 12.85 when run from the cable crimp to the body or the ground-cable body connection.This situation acts like there is "brake or disconnect" in the cable between the battery and the engine compartment or that main fuse - the one I can't find - is blown.  Before I start tearing things apart, where does the hot cable run, inside or under the car.I don't think my cheap and your cheap are anywhere close together. Thanks, Chuck

Maybe I can help a bit. Back in the battery area, use the VOM, black lead on the bolt that connects the negative terminal to the chassis. Red lead on the batt cable clamp on the + terminal of the batt. Should be 12-13V. Not on the batt lugs, but on the specific points as mentioned.  If you have 12V there, move to the engine bay. In the shallow well,  aft of the right fender liner, just in front of the door shell there is a large cable, which is the cable from the + of the batt. It bolts
to a large terminal lug, and there is another terminal lug with a large wire leading toward the center of the firewall. It is under the wiper motor, and is hard to spot.
Once you locate that, put the negative lead of the meter to an unpainted bolt on the chassis, and red lead to the outside lug of the large cable. Check for 12V. If you have it there, move across the copper segment to the other lug and check for 12V. If you have no voltage at either of these points you have a break in the cable from the batt box up to the engine bay, or the copper segment(fuse) is open. It is a very large fuse, but it's rated at about 130 amps so I doubt that is the problem.
This is your primary circuit that leads to everything inside the dash and also to the starter solenoid. If you can get to it, you could check the voltage at the back of the ignition switch for 12V on one large wire, probably red in color. This is the primary for the ignition, fuel pump, and starter pick. If you have 12V at the back of
the ignition switch, then the ignition switch might be bad, I've seen it before.  Let us know what you find from here. Be careful around the large wires from the batt. You can't get shocked, but you can draw a large arc if you short one of them to ground. If you take any of the lugs or wires off, make sure the batt is disconnected first.  Doc

i recommend joining this group for technical help with vintage Lamborghini

Ray says -  I am the owner of 9560, one of the Espadas with an automatic transmission. I can tell you that in 5 years I have had the car  it  has been relatively trouble free. This group helped me out with  getting a set of spark plug wires last summer and that has made a  world of difference in how the car runs - smoother, quieter,  cooler,  better milage, etc. As an occasional contributor but constant reader, I finally made some time last night to gather some info off the car: 9560 is a series 3 with a manufacture date of Nov, 19 1974 on the plates. Except for a new headliner, some carpet, newer brakeboosters  and some black paint under the hood, the car is unrestored (as far as  I know) with ~68,000 miles. The wiper motor is a Marelli, round with model number TGE571-A  stamped on it. The washer pump is a Lucas 5SJ The wheels have both Campongolo and LAMBORGHINI 7JJx15 written on  them, the letters are impressed into the wheel. The electronic ignition system is Bosch 227 200 002 (002 looks  like a  rev number, it is in a different font) The carbs are a mix of 40 DC022A and 40 DCO23A For those gathering parts info, I would be glad to continue to  poke  around and get numbers off the car (this will no doubt force me to  learn more which is always a good thing).  Ray
Bob's Espada photo album - http://pg.photos.yahoo.com/ph/staatsof/my_photos

Hi guys! I just downloaded some pictures of the process taken to replace turn signal switch in my s2 Espada. see VLG photos section. To remove the Espada steering wheel spanner nut, I used a 1 1/16 craftsman 12 point socket with a .15in thick pin which I set into one notch on the nut and then tapped the socket over it with the plastic handle of a screwdriver. The socket with the pin held the nut for reinstallation and wiggled off when finished. This did not damage the nut in any way. Gus (Espada 8940)


Espada/Bertone
series
chassis
engine
color
interior
release date
dealer
notes
x750x


x750x0779x

8970
40955
luci del bosco
senape
19th January 1973
ZANI

x750x


x750x0805x

8986
41041
rosso granada
senape
30th March 1973
Lamborghini Espagnola (Spain)

x750x


x750x0995x

9436
41338
blu francia
senape
9th August 1974
AUTO MODENA in Australia

x750x