2006 Starter solenoid replacement for Lamborghini Miura P400
Basic data for original number reference already listed at - http://www.huskyclub.com/tav15.html
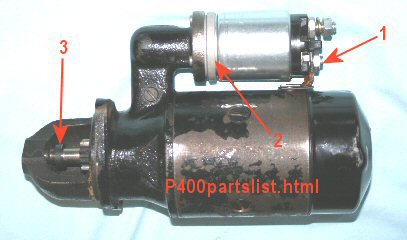
1. Had to cut off 3 threads off the lower, large electrical stud. only
used a single nut (just like original installation). It would seem like
this is so minor that just fiddling with the pieces could work around
this, but what is not apparent is the close tolerance of the short,
starter strap cable. The end result is the three or four threads need
to come off, which by the way, is making it the same as the oem
solenoid. I used an air powered cut off wheel, cleaned up with file and
wire wheel brush.
2. The supplied ring adapter to allows the new solenoid to be
positioned at 12 o clock, just like original. I believe it is required
to get proper spacing and travel from solenoid plunger as well. Three
screws are supplied to attach via recessed mounting holes.
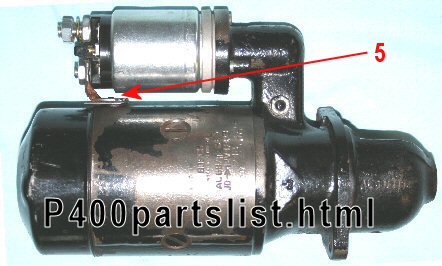
3. side note - if you are to pull starter apart, you must pry this
collar toward the starter to allow access to a simple circlip ring.
self explanatory after that.
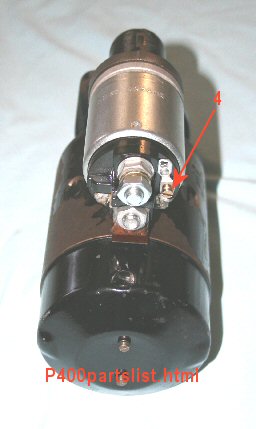
Ignition key switch hook up wire comes out on opposite side from original, doesn't matter.
The original starter solenoid is 57mm in diameter, this new replacment
is 61mm in diameter. Depending on the installation this could cause a
fatal contact problem. Be aware on 350/400GT Bosch starters this
can be a problem! Picture shows a Miura starter and there is 3mm
clearance which would appear to be fine.
additional information on new replacement solenoid -
supplied with new solenoid - 1 solenoid, 1 adapter ring, 3 screws to
attach adapter ring, 2 lock washers for large elec stud, 2 nuts for
large elec studs, 1 spring for solenoid.
solenoid stamped - ZM 7419601 12v
packaging marked - 741 02131 Made in Brazil
supplied items i did not use - 1 lock washer, 1 large nut
modifications - cut off 3 threads on lower electrical stud using air powered cut off wheel
cost of new replacement solenoid - approx $40
supplier -
Robert Kirk - Kirk's Auto Refitters
1017 Mississippi Ave
Davenport, IA 52803
563-323-1017
<kirkbrit@yahoo.com>
notes - i have only loosely put
this together for fit purposes and this is a spare back up for me. My
only thought on this today is - even tho the oem solenoid used a single
nut at the bottom connection, and i have set this up the same way, i
have a concern about the final torque on the lower stud causing the
stud to rotate just slightly and breaking electrical connection inside.
My concern may be unwarranted, but i cannot see how the old stud or new
stud is held in place mechanically to keep it from rotating. I might cut a slot in the stud end (and maybe both)
to use a screwdriver to hold stud while performing final torque. A
Dremel tool should be fine to cut slot. The original new lower single nut holding the stud on
the solenoid was not very tightly torqued, so using a "trapped between
2 nuts" technique might have same rotation at final torque problems. Anyway , just my thoughts.
published 2/24/2006
Miura technical reference